Most people perhaps don’t think of crochet as a bushcraft skill, but what is bushraft if not crafting things from natural materials to turn them into something useful. I decided that I wanted to make an item of clothing from wool from scratch but like any project this required lots of intermediate steps. This isn’t so much a how to but a story of the journey of improvisation, problem solving and learning as you go.
First I needed to teach myself to knit or crochet, I found crochet easier so started to learn how to do that by watching YouTube videos. After lots of hours of practice I made several hats and scarves and I made a cardigan out of sewn together squares. Once I was happy that I could crochet well enough it was time to look to make my own wool.


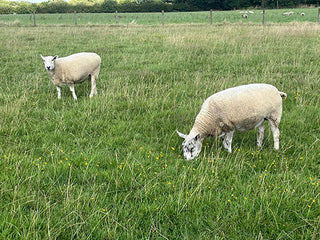
One of my friends has 4 sheep that they adopted, and they kindly gifted me their fleece. (unfortunately, I didn’t raise my own sheep or get to shear them, but this will have to be where I draw the line at my from scratch project) we are not 100% sure of the breed of sheep and they are likely to be a cross breed.

The first step was to pick out the biggest pieces of vegetation and to wash the fleece. It’s important to make sure that during the washing process you don’t end up felting the wool together by using water that is too hot and aggravating the fibers.
Next, I needed to make some wool combs I did this by drilling some holes into a board as close together as possible. I then put in 6 inch nails, put another piece of wood behind these and glued them in place before adding some dowl handles at a rough 45-degree angle so they felt ergonomic.


The next step was that I wanted to use a drop spindle inspired by Turkish drop spindles I saw online. I decided to whittle one out of a piece of Yew wood, I enjoyed the two-tone effect of the wood with the red and yellow running throughout. I liked the fact that to Turkish drop spindle can be taken apart to leave the wool in a ball, without the need to unwind from the spindle.


I decided that I should comb a bit then spin a bit so it was time to test my wool combs. I loaded one of the combs with pieces of the wool fleece, I held this in my left hand, then using the comb in my right to brush past the wool tips to transfer the wool from one combed to the other. As you do this it helps to get rid of some of the vegetation that the washing didn’t, it also helps to line up the wool fibers to get rid of the knots to make it easier to spin. Usually I would transfer the wool from comb 1 to 2 and back again but a third pass was occasionally needed. Any of the shorter fibers or partially knotted parts would stay on the first comb, I would take them off and put them into another bag that I might felt with later.


Once all the wool is fluffed up on the comb, I pulled it off in one long section ready to spin. When I first started to spin the wool, having never spun wool before, as with learning most new skills there can be a learning curve. I started off using the park and draft technique where you give the spindle a spin then stop the spindle by placing it between your legs. Then draft out a little wool between your fingers and thumb of both hands and allow the twist to travel up the small section that you drafted out. I learnt that it’s important to pinch the wool to stop the twist traveling into wool waiting to be drafted. And to take time with the drafting to tease out just enough fibres, and to try and be selective about which fibres make it into the yarn and to try and discard the lumpy knotted bits.


As I started to attempt to use the drop spindle fully suspended (without parking it between your knees) I noticed that the spindle wasn’t spinning very well or spinning for very long. So I got my knife out and reshaped the spindle to make it a lot more balanced and to try and move the mass towards the edges by making the middle lighter.
With a bit of practice, I was spinning the wool consistently without too many lumpy bits. But I appreciated that as long as they aren’t too large or drastic a few variations along the length of the yarn are to be expected and add character to a handmade yarn. Now all I needed to do was to keep combing and spinning until I had enough wool.
For my final side quest before it was time crochet, I wanted to make a hook. So, I used a muntjac deer leg bone and some files to create one.


And finally started to crochet the hand spun yarn with my hand made crochet hook into a large section, this would be the front of my wooly gilet. I would then make a second and a larger piece as the back, I then made thinner triangle shaped pieces to go over my shoulders. Before I joined all the sections together with a chain stitch.


Finally, I finished with my wool gilet. It certainly has that handmade look about it which give it a unique look. As this is my first attempt at spinning there are some bobbly bits. The yarn that you learn on and practice with probably isn’t the best thing to make clothing with but I'm happy to have put it to use.
As my spinning journey continues I will get better at spinning and maybe two ply the yarn together which will make the wool more evenly balanced and maybe I will make something else. In the future I would also like to experiment with dying the wool from naturally foraged materials.
I still have some wool left from my first batch, maybe I will use this to do some Nålebinding.